Leave your message to get our Quick response
edoxi automated message icon

AutoCAD 2D and 3D Course

A man working on architectural designs using AutoCAD software on dual monitors in a modern office.
Edoxi’s 30-hour online AutoCAD 2D and 3D course helps you master drafting and design for architecture, engineering, and manufacturing. You'll learn to create precise 2D drawings and detailed 3D models, improving both accuracy and project efficiency. The course covers essential tools for technical drawings, blueprints, and schematics, along with 3D techniques for visualising and validating designs. Suitable for beginners and professionals, this hands-on training prepares you for roles like 2D Drafter or 3D Modeller. Get expert-led instruction, flexible online access, and a certificate upon completion. Enrol now and bring your design ideas to life.
Course Duration
30 Hours
Corporate Days
5 Days
Learners Enrolled
500+
Modules
14
star-rating-icon1
star-rating-icon2
star-rating-icon3
Course Rating
4.9
star-rating-4.9
Mode of Delivery
Online
Accredited by

What You’ll Learn from the AutoCAD 2D & 3D Course

Master the Basics of AutoCAD
You’ll get familiar with the AutoCAD interface and essential drafting tools. You’ll learn how to use features like Object Snap (OSNAP), Dynamic Input, and Polylines to boost your efficiency. We’ll also guide you on customizing your workspace and utilizing valuable command-line functionalities.
Organize Layers Like a Pro
You’ll learn how to manage your layers effectively for a clear and organized workflow. You’ll discover how to easily switch between Model Space and Paper Space, allowing you to create accurate viewports for your technical documents.
Draw with Parametric and Dynamic Blocks
You’ll gain practical experience in parametric drawing techniques and learn how to create dynamic blocks. We will also explain how to use external references (Xrefs) to manage complex designs smoothly.
Build 3D Models and Utilize Coordinate Systems
You’ll dive into creating detailed 3D models using the User Coordinate System (UCS) and solid modelling tools. You will learn to execute Boolean operations such as union, subtract, and intersect to enhance your designs.
Create Stunning Visuals and Professional Renderings
You’ll discover how to apply materials, textures, and lighting to make your 3D models look realistic. You’ll also learn to develop section views to showcase your work professionally and clearly.
Streamline Layouts and Integrate Bill of Quantities (BOQ)
You’ll create refined layouts with title blocks and introduce Bill of Quantities (BOQ) calculation tools. Master effective management of your sheet sets to simplify your project documentation.

About Our AutoCAD 2D & 3D Course 

Edoxi’s 30-hour online AutoCAD 2D and 3D course is designed to help you start or enhance your design career in fields like architecture, engineering, interior design, and construction. Whether you're a beginner or looking to sharpen your skills, this course provides the hands-on training you need to succeed.

You’ll learn to:

    • 2D Drafting – Create accurate technical drawings, layouts, and blueprints used in real-world projects.
    • 3D Modelling – Design and visualise complex structures for presentations, simulations, and design validation.

This course is taught using the latest AutoCAD 2025 software, giving you access to up-to-date tools and features used by professionals worldwide. You'll work on practical, industry-aligned projects that help you build a strong portfolio and apply what you learn immediately.

We understand your schedule matters. That’s why our online training is flexible and accessible, allowing you to learn at your own pace, from wherever you are.

By completing this course, you’ll gain job-ready skills and become confident in using AutoCAD across various industries. With infrastructure and design sectors growing globally, skilled professionals are in high demand.

Career opportunities include:

    • Draftsman – Produce detailed technical drawings that communicate design intent.
    • Architectural Designer – Create innovative and functional building designs.=
    • Project Manager – Plan and manage design and construction projects effectively.
    • Quantity Surveyor – Monitor and control project costs to ensure value.

With AutoCAD proficiency, you can boost your productivity by up to 63% using specialised drafting and modelling tools. This course not only enhances your skill set but also increases your efficiency, helping you stand out in today’s competitive job market. Enrol now to get started. 

Our AutoCAD 2D & 3D Training Features

Personalized Learning Tailored to You

Our one-on-one sessions ensure you receive dedicated support from your instructor, allowing you to master AutoCAD’s tools and techniques at a pace that suits you best.

Gain Real-World Project Experience

You'll engage in practical projects, such as designing complete villa plans. By working on real projects, you’ll learn the essential drafting practices and annotation skills used in the industry, preparing you for a successful career.

Master Advanced 3D Modeling

Unleash your creativity with advanced solid modelling tools. You’ll learn how to design intricate assemblies and machinery, mastering professional techniques for creating stunning mechanical and architectural visualizations that will impress you.

Stay Current with AutoCAD 2025

Keep your skills sharp by learning the latest features of AutoCAD 2025. Discover new tools that boost your efficiency and give you a competitive edge in your field.

Who Can Join Edoxi’s AutoCAD 2D & 3D Training?

Architects and Architectural Interns

If you're an architect or currently interning, this course helps you create precise 2D plans and 3D models, improving your design workflow and presentation skills for real-world architectural projects.

Civil and Structural Engineers

This training equips you with the tools to draft detailed structural layouts, site plans, and construction drawings—essential for planning and executing infrastructure and engineering projects.

Manufacturing and Mechanical Engineers

Learn to design, visualise, and prototype mechanical components and assemblies in 3D, enabling better accuracy and efficiency in manufacturing design processes.

Interior Designers and Decorators

Gain the skills to translate creative interior concepts into technical 2D layouts and immersive 3D visualisations, enhancing your client presentations and space planning.

CAD Technicians and Drafters

Whether you're starting or want to refine your skills, this course strengthens your drafting accuracy and introduces advanced AutoCAD features used in professional CAD environments.

Design Students and Fresh Engineering Graduates

If you're new to the industry, this course gives you hands-on experience and a solid foundation in AutoCAD, helping you build a strong portfolio and improve your employability.

AutoCAD 2D and 3D Course Modules


AutoCAD 2D Modules

Module 1: Getting Started with AutoCAD
  • Chapter 1.1: Introduction to AutoCAD

    • Lesson 1.1.1: Starting the Software
    • Lesson 1.1.2: Exploring the User Interface
    • Lesson 1.1.3: Working with Commands
    • Lesson 1.1.4: Understanding the Cartesian Workspace
    • Lesson 1.1.5: Opening an Existing Drawing File
    • Lesson 1.1.6: Viewing Your Drawing
    • Lesson 1.1.7: Saving Your Work
Module 2: Basic Drawing and Editing Commands
  • Chapter 2.1: Core Drawing Techniques

    • Lesson 2.1.1: Drawing Lines
    • Lesson 2.1.2: Drawing Vertical and Horizontal Lines
    • Lesson 2.1.3: Drawing Rectangles
    • Lesson 2.1.4: Drawing Circles
    • Lesson 2.1.5: Erasing Objects
    • Lesson 2.1.6: Undo and Redo Actions
Module 3: Projects – Creating a Simple Drawing
  • Chapter 3.1: Simple Drawing Projects

    • Lesson 3.1.1: Creating a Simple Drawing
    • Lesson 3.1.2: Creating Simple Shapes
Module 4: Advanced Drawing Techniques
  • Chapter 4.1: Using Object Snaps and Tracking

    • Lesson 4.1.1: Using Running Object Snaps
    • Lesson 4.1.2: Using Object Snap Overrides
    • Lesson 4.1.3: Polar Tracking at Angles
    • Lesson 4.1.4: Object Snap Tracking
    • Lesson 4.1.5: Drawing with Snap and Grid
Module 5: Making Changes in Your Drawing
  • Chapter 5.1: Editing Basics

    • Lesson 5.1.1: Selecting Objects for Editing
    • Lesson 5.1.2: Moving Objects
    • Lesson 5.1.3: Copying Objects
    • Lesson 5.1.4: Rotating Objects
    • Lesson 5.1.5: Scaling Objects
    • Lesson 5.1.6: Mirroring Objects
    • Lesson 5.1.7: Editing with Grips
Module 6: Projects – Making Your Drawings More Precise
  • Chapter 6.1: Hands-On Projects

    • Lesson 6.1.1: Schematic Project: Electronics Diagram
    • Lesson 6.1.2: Architectural Project: Landscape
    • Lesson 6.1.3: Mechanical Project: Using Polar and Tracking
    • Lesson 6.1.4: Mechanical Project: Surge Protector
    • Lesson 6.1.5: Mechanical Project: Satellite
Module 7: Organizing Your Drawing with Layers
  • Chapter 7.1: Working with Layers

    • Lesson 7.1.1: Creating New Drawings with Templates
    • Lesson 7.1.2: Understanding Layers
    • Lesson 7.1.3: Managing Layer States
    • Lesson 7.1.4: Changing an Object’s Layer
Module 8: Advanced Object Types
  • Chapter 8.1: Drawing Complex Shapes

    • Lesson 8.1.1: Drawing Arcs
    • Lesson 8.1.2: Drawing Polylines
    • Lesson 8.1.3: Editing Polylines
    • Lesson 8.1.4: Drawing Splines
    • Lesson 8.1.5: Drawing Polygons
    • Lesson 8.1.6: Drawing Ellipses
Module 9: Analyzing Model and Object Properties
  • Chapter 9.1: Working with Object Properties

    • Lesson 9.1.1: Managing Object Properties
    • Lesson 9.1.2: Measuring Objects
Module 10: Projects – Drawing Organization and Information
  • Chapter 10.1: Practical Applications

    • Lesson 10.1.1: Architectural Project
    • Lesson 10.1.2: Mechanical Project
    • Lesson 10.1.3: Civil Project
Module 11: Advanced Editing Commands
  • Chapter 11.1: Enhancing Your Editing Skills

    • Lesson 11.1.1: Trimming and Extending Objects
    • Lesson 11.1.2: Stretching Objects
    • Lesson 11.1.3: Creating Fillets and Chamfers
    • Lesson 11.1.4: Offsetting Objects
    • Lesson 11.1.5: Creating Arrays of Objects
Module 12: Introduction to Blocks
  • Chapter 12.1: Understanding Blocks

    • Lesson 12.1.1: What are Blocks?
    • Lesson 12.1.2: Inserting Blocks using the Blocks Palette
    • Lesson 12.1.3: Inserting Blocks using the Tool Palettes
    • Lesson 12.1.4: Inserting Dynamic Blocks
    • Lesson 12.1.5: Inserting Blocks using the DesignCenter
Module 13: Projects – Creating More Complex Objects
  • Chapter 13.1: Advanced Projects

    • Lesson 13.1.1: Mechanical Project 1: Plate
    • Lesson 13.1.2: Mechanical Project 2: Gasket
    • Lesson 13.1.3: Mechanical Project 3: Plate
    • Lesson 13.1.4: Mechanical Project 4: Rocker Arm
    • Lesson 13.1.5: Architectural Project 1: Floor Plan
    • Lesson 13.1.6: Architectural Project 2: Floor Plan
    • Lesson 13.1.7: Civil Project: Parking Lot
Module 14: Setting Up a Layout
  • Chapter 14.1: Layout Essentials

    • Lesson 14.1.1: Working in Layouts
    • Lesson 14.1.2: Creating Layouts
    • Lesson 14.1.3: Creating Layout Viewports
    • Lesson 14.1.4: Named Views
    • Lesson 14.1.5: Guidelines for Layouts
Module 15: Printing Your Drawing
  • Chapter 15.1: Printing Fundamentals

    • Lesson 15.1.1: Printing Concepts
    • Lesson 15.1.2: Printing Layouts
    • Lesson 15.1.3: Print and Plot Settings
Module 16: Projects – Preparing to Print
  • Chapter 16.1: Printing Projects

    • Lesson 16.1.1: Mechanical Project
    • Lesson 16.1.2: Architectural Project
Module 17: Text
  • Chapter 17.1: Working with Annotations

    • Lesson 17.1.1: Adding Text in a Drawing
    • Lesson 17.1.2: Modifying Multiline Text
    • Lesson 17.1.3: Formatting Multiline Text
    • Lesson 17.1.4: Adding Notes with Leaders to Your Drawing
    • Lesson 17.1.5: Creating Tables
    • Lesson 17.1.6: Modifying Tables
Module 18: Hatching
  • Chapter 18.1: Using Hatches

    • Lesson 18.1.1: Hatching
    • Lesson 18.1.2: Editing Hatches
Module 19: Adding Dimensions
  • Chapter 19.1: Dimensioning Your Drawings

    • Lesson 19.1.1: Dimensioning Concepts
    • Lesson 19.1.2: Adding Linear Dimensions
    • Lesson 19.1.3: Adding Radial and Angular Dimensions
    • Lesson 19.1.4: Editing Dimensions
Module 20: Projects – Annotating Your Drawing
  • Chapter 20.1: Annotation Projects

    • Lesson 20.1.1: Mechanical Project
    • Lesson 20.1.2: Architectural Project 1
    • Lesson 20.1.3: Architectural Project 2
    • Lesson 20.1.4: Civil Project

AutoCAD 3D Modules

Module 1: 3D Foundations
  • Chapter 1.1: Why Use 3D?

    • Lesson 1.1.1: Benefits of 3D Modeling in Design
    • Lesson 1.1.2: Applications of 3D Modeling Across Industries
  • Chapter 1.2: Introduction to the 3D Modeling Workspace

    • Lesson 1.2.1: Overview of the 3D Interface
    • Lesson 1.2.2: Customizing the Workspace for 3D Modeling
  • Chapter 1.3: Basic 3D Viewing Tools

    • Lesson 1.3.1: Using Standard Views
    • Lesson 1.3.2: Perspective vs. Orthographic Views
  • Chapter 1.4: 3D Navigation Tools

    • Lesson 1.4.1: Panning, Zooming, and Orbiting
    • Lesson 1.4.2: Using the ViewCube and SteeringWheels
  • Chapter 1.5: Introduction to the User Coordinate System (UCS)

    • Lesson 1.5.1: Understanding the UCS
    • Lesson 1.5.2: Benefits of Customizing the UCS
Module 2: Simple Solids
  • Chapter 2.1: Working with Solid Primitives

    • Lesson 2.1.1: Creating Basic Solid Shapes
    • Lesson 2.1.2: Editing Solid Primitives
  • Chapter 2.2: Solid Primitive Types

    • Lesson 2.2.1: Overview of Primitive Types (Box, Cylinder, Sphere, etc.)
    • Lesson 2.2.2: Use Cases for Different Solid Types
  • Chapter 2.3: Working with Composite Solids

    • Lesson 2.3.1: Combining Solids
    • Lesson 2.3.2: Intersecting and Subtracting Solids
  • Chapter 2.4: Working with Mesh Models

    • Lesson 2.4.1: Creating Mesh Models
    • Lesson 2.4.2: Converting Solids to Meshes and Vice Versa
Module 3: Working with the User Coordinate System
  • Chapter 3.1: UCS Basics

    • Lesson 3.1.1: What is the User Coordinate System?
    • Lesson 3.1.2: Default UCS vs. Custom UCS
  • Chapter 3.2: UCS X, Y, and Z Commands

    • Lesson 3.2.1: Moving and Rotating the UCS
    • Lesson 3.2.2: Aligning the UCS with Objects
  • Chapter 3.3: UCS Multi-functional Grips

    • Lesson 3.3.1: Using Grips for UCS Manipulation
    • Lesson 3.3.2: Advanced UCS Positioning
  • Chapter 3.4: Saving a UCS by Name

    • Lesson 3.4.1: Creating and Naming a UCS
    • Lesson 3.4.2: Managing Multiple UCS Configurations
Module 4: Creating Solids and Surfaces from 2D Objects
  • Chapter 4.1: Complex 3D Geometry

    • Lesson 4.1.1: Understanding Complex Geometries
    • Lesson 4.1.2: Using 2D Shapes as a Basis for 3D
  • Chapter 4.2: Extruded Solids and Surfaces

    • Lesson 4.2.1: Creating Extrusions
    • Lesson 4.2.2: Editing Extruded Geometry
  • Chapter 4.3: Swept Solids and Surfaces

    • Lesson 4.3.1: Creating Sweeps from Profiles
    • Lesson 4.3.2: Customizing Sweep Paths
  • Chapter 4.4: Revolved Solids and Surfaces

    • Lesson 4.4.1: Creating Revolutions Around an Axis
    • Lesson 4.4.2: Modifying Revolved Objects
  • Chapter 4.5: Lofted Solids and Surfaces

    • Lesson 4.5.1: Understanding Lofting Concepts
    • Lesson 4.5.2: Creating and Editing Lofted Shapes
  • Chapter 4.6: NURBS Surfaces

    • Lesson 4.6.1: Introduction to NURBS
    • Lesson 4.6.2: Manipulating NURBS for Advanced Surfaces
Module 5: Modifying in 3D Space
  • Chapter 5.1: 3D Gizmo Tools

    • Lesson 5.1.1: Overview of Move, Rotate, and Scale Gizmos
    • Lesson 5.1.2: Customizing Gizmo Settings
  • Chapter 5.2: Aligning Objects in 3D Space

    • Lesson 5.2.1: Techniques for Object Alignment
    • Lesson 5.2.2: Using Constraints for Precise Positioning
  • Chapter 5.3: 3D Modify Commands

    • Lesson 5.3.1: Using Fillet, Chamfer, and Shell Commands
    • Lesson 5.3.2: Advanced Editing with Slice and Intersect
Module 6: Advanced Solid Editing
  • Chapter 6.1: Editing Components of Solids

    • Lesson 6.1.1: Modifying Solid Components
    • Lesson 6.1.2: Adding and Removing Elements from Solids
  • Chapter 6.2: Editing Faces of Solids

    • Lesson 6.2.1: Extruding and Moving Faces
    • Lesson 6.2.2: Offsetting and Rotating Faces
  • Chapter 6.3: Fillets and Chamfers on Solids

    • Lesson 6.3.1: Applying Fillets to Solids
    • Lesson 6.3.2: Creating Chamfers on Edges
Module 7: Additional Editing Tools
  • Chapter 7.1: Creating a Shell

    • Lesson 7.1.1: Shelling Solids to Create Hollow Objects
    • Lesson 7.1.2: Adjusting Shell Thickness
  • Chapter 7.2: Imprinting Edges of Solids

    • Lesson 7.2.1: Techniques for Edge Imprinting
    • Lesson 7.2.2: Customizing Imprinted Patterns
  • Chapter 7.3: Slicing a Solid Along a Plane

    • Lesson 7.3.1: Using the Slice Command
    • Lesson 7.3.2: Splitting Solids for Complex Edits
  • Chapter 7.4: Interference Checking

    • Lesson 7.4.1: Detecting Interferences in Models
    • Lesson 7.4.2: Resolving Interference Issues
  • Chapter 7.5: Converting Objects to Surfaces

    • Lesson 7.5.1: Transforming Solids into Surfaces
    • Lesson 7.5.2: Applications of Surface Conversion
  • Chapter 7.6: Converting Objects to Solids

    • Lesson 7.6.1: Transforming Surfaces into Solids
    • Lesson 7.6.2: Ensuring Solid Integrity During Conversion
Module 8: Refining the View
  • Chapter 8.1: Working with Sections

    • Lesson 8.1.1: Creating Section Views
    • Lesson 8.1.2: Using Sections for Analysis
  • Chapter 8.2: Working with Cameras

    • Lesson 8.2.1: Setting Up Camera Views
    • Lesson 8.2.2: Adjusting Camera Properties for Visualization
  • Chapter 8.3: Managing Views in 3D

    • Lesson 8.3.1: Customizing Viewports
    • Lesson 8.3.2: Saving and Restoring 3D Views
  • Chapter 8.4: Animating with ShowMotion

    • Lesson 8.4.1: Overview of ShowMotion Features
    • Lesson 8.4.2: Setting Up ShowMotion Shots
    • Lesson 8.4.3: Creating and Exporting Animations
Module 9: Point Clouds
  • Chapter 9.1: Point Clouds

    • Lesson 9.1.1: Introduction to Point Cloud Data
    • Lesson 9.1.2: Using Point Clouds for Model Reference
    • Lesson 9.1.3: Editing and Managing Point Clouds
Module 10: Visualization
  • Chapter 10.1: Creating Visual Styles

    • Lesson 10.1.1: Applying and Customizing Visual Styles
    • Lesson 10.1.2: Managing Visual Style Libraries
  • Chapter 10.2: Working with Materials

    • Lesson 10.2.1: Applying Materials to Objects
    • Lesson 10.2.2: Editing and Managing Material Properties
  • Chapter 10.3: Specifying Light Sources

    • Lesson 10.3.1: Types of Lights in 3D Modeling
    • Lesson 10.3.2: Positioning and Adjusting Lights for Rendering
  • Chapter 10.4: Rendering Concepts

    • Lesson 10.4.1: Setting Up Render Parameters
    • Lesson 10.4.2: Techniques for High-Quality Rendering
Module 11: Working Drawings from 3D Models
  • Chapter 11.1: Creating Multiple Viewports

    • Lesson 11.1.1: Setting Up Viewports for 2D Drawings
    • Lesson 11.1.2: Managing Multiple Views in a Layout
  • Chapter 11.2: 2D Views from 3D Solids

    • Lesson 11.2.1: Generating 2D Views Automatically
    • Lesson 11.2.2: Customizing 2D Views for Documentation
  • Chapter 11.3: Creating Technical Drawings with Flatshot

    • Lesson 11.3.1: Using Flatshot for 2D Extraction
    • Lesson 11.3.2: Enhancing Flatshot Output for Clarity
  • Chapter 11.4: 3D Model Import

    • Lesson 11.4.1: Importing External 3D Models
    • Lesson 11.4.2: Adjusting Imported Models for Integration
  • Chapter 11.5: Automatic Model Documentation

    • Lesson 11.5.1: Generating Documentation Directly from 3D Models
    • Lesson 11.5.2: Reviewing and Refining Automated Documentation
  • Chapter 11.6: 3D Printing

    • Lesson 11.6.1: Preparing Models for 3D Printing
    • Lesson 11.6.2: Exporting Files in 3D Printer-Compatible Formats

Download Autocad 2D and 3D Course Brochure

Real-World Projects in AutoCAD 2D & 3D Training

To ensure you gain practical, hands-on experience, Edoxi’s AutoCAD 2D & 3D course includes real-world projects and activities that simulate professional design scenarios. These projects are carefully designed to help you apply your skills, improve your drafting accuracy, and build a portfolio that reflects industry standards. Here's what you’ll work on during your training:

Projects

  • Residential Villa Design

    You will design a residential villa using detailed 2D drawings, including floor plans, elevations, and sections. You’ll learn to use title blocks, dimensions, annotations, and layering, mastering essential tools for professional drafting and construction documentation.

  • Mechanical Assembly Design

    You will create 3D models of mechanical parts and assemble them using solid modelling tools. This project will focus on precision, applying geometric constraints, and generating assembly drawings with exploded views and a bill of materials.

  • 3D Shape Modeling and Visualization

    You will model complex 3D shapes using techniques like lofting, sweeping, and Boolean operations. You'll also enhance your designs with materials, textures, and lighting setups to produce realistic renderings for presentation or review.

  • Commercial Office Layout Planning

    You will develop a complete 2D layout for a commercial office space, including workstation arrangements, electrical layouts, and furniture placement. This activity helps you understand spatial planning and technical drawing conventions used in interior and architectural design.

AutoCAD 2D & 3D Course Outcome and Career Opportunities

Completing Edoxi’s AutoCAD 2D & 3D course will significantly enhance your design skills and open up job opportunities across industries such as architecture, engineering, construction, and manufacturing. Here’s what you will learn and the potential careers you can pursue:

Course Outcome Image
You will learn to create and edit 2D drawings using layers, line types, hatching, and text annotations.
You will understand how to generate construction documents like floor plans, elevations, and section views.
You will gain the ability to measure accurately and communicate dimensions effectively in your drawings.
You will become familiar with plotting and print settings to present your work professionally for construction or client reviews.
You will master the creation and editing of 3D models using tools such as solids, surfaces, and meshes.
You will learn how to render 3D models to produce realistic visual presentations of your designs.

Career Opportunities After the AutoCAD 2D & 3D Course

  • 2D Drafter
  • 3D Modeller
  • CAD Technician
  • Architectural Designer
  • Civil Draftsman
  • Mechanical Design Engineer
  • Interior Designer
  • Project Engineer
  • Design Engineer
  • Quantity Surveyor
  • Urban Planner/Designer
  • Freelance CAD Designer

AutoCAD 2D & 3D Training Options

Live Online Training

  • 30 Hours of Real-time Remote Learning Sessions

  • One-to-One Virtual Instruction

  • Interactive Project Development

  • Flexible Schedule Options

  • Study Materials

Corporate Training

  • 5-Day Intensive Program

  • Customized Learning Path

  • Team-focused Training

  • Structured Project Implementation

  • Training delivered at the client’s site, star hotel, or Edoxi

Do You Want a Customised Training foAutocad 2D and 3D?

Get expert assistance in getting your Autocad 2D and 3D Course customised!

How to Get AutoCAD 2D and 3D Certified?

Here’s a four-step guide to becoming a certified AutoCAD 2D and 3D professional.

Do You Want to be a Certified Professional in Autocad 2D and 3D?

Join Edoxi’s Autocad 2D and 3D Course

Why Should You Choose Edoxi for AutoCAD 2D and 3D Training?

Here are some of the compelling reasons to choose Edoxi for AutoCAD 2D and 3D Training.

Autodesk Authorized Training Institute

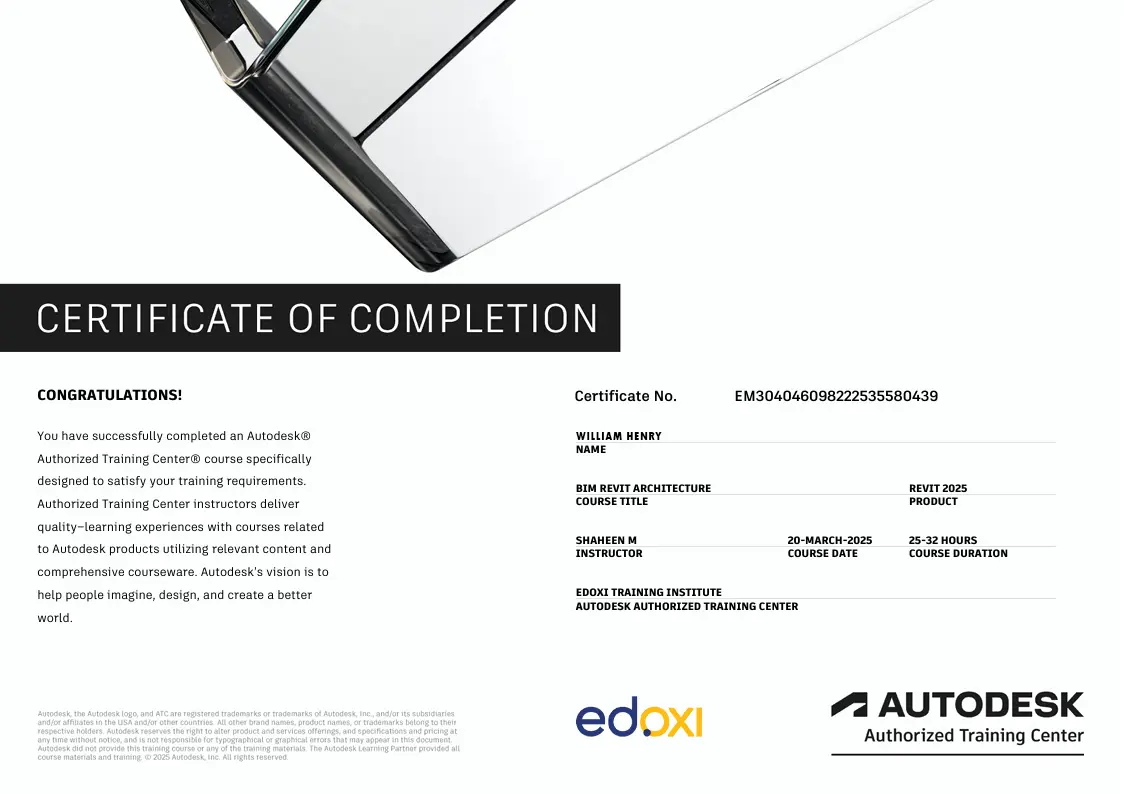
At Edoxi, you receive training from an Autodesk authorized center, ensuring high-quality education in both 2D and 3D AutoCAD.

Professional AutoCAD Laboratory

Get hands-on experience! Our state-of-the-art lab is equipped with the latest Autodesk software and tools, giving you the resources you need to master AutoCAD.

Flexible Training Schedule

We understand your busy lifestyle. Choose between classroom and online options that fit your schedule, allowing you to balance work and learning effectively.

Autodesk Certified Trainer

Learn from the experts! Our trainer is certified by Autodesk and brings a wealth of experience to help you succeed in your AutoCAD journey.

students-image

Edoxi is Recommended by 95% of our Students

Meet Our Mentor

Our mentors are leaders and experts in their fields. They can challenge and guide you on your road to success!

mentor-image

MANDER G SINGH

Mander Singh is a Senior Design Professional with over 9 years of experience in interior design, architecture, and project management. He specialises in BIM, modelling, drafting, and sustainable design, using tools like AutoCAD, Revit, SketchUp, and Lumion. Mander is known for his practical, hands-on training that equips learners with real-world skills in architecture and interior design.

Mander holds a Bachelor's in Architecture and is certified in Advanced Revit Training. He has led high-end commercial and hospitality projects in India and the UAE. He also has experience in delivering innovative design solutions and managing fit-out projects. Mander is passionate about sustainable design, mentoring future talent, and using the latest technology to boost creativity and efficiency.

Locations Where Edoxi Offers Autocad 2D and 3D Course

Here is the list of other major locations where Edoxi offers Autocad Course

FAQ

What are the prerequisites for the AutoCAD 2D and 3D course?
To join the course, you should have basic computer skills and some familiarity with technical drawing. A grasp of design principles is also beneficial.
Can I enroll in only the AutoCAD 3D course?
Yes, you can! If you already have skills in AutoCAD 2D, you can directly sign up for the 10-hour AutoCAD 3D training.
Do you provide guidance on installing AutoCAD software?
Definitely! We assist you with the installation process and help you get started using AutoCAD.
How do classroom and online training differ?
Both options provide personalized attention and expert instruction. In classroom sessions, you’ll utilize our AutoCAD lab, while online training includes interactive virtual sessions that cover the same material.
What kind of projects will I complete in the AutoCAD 2D & 3D course?
You’ll work on a variety of professional projects, including detailed villa layouts with title blocks, 3D mechanical assemblies, and architectural visualizations. These projects will help you create a strong portfolio to showcase your skills.